Hello lovelies. I can't thank you enough for stopping by Budget Bliss over the years. I started this blog in 2012 as a creative outlet but it became so much more.
The bad news: Budget Bliss is going bye bye.
The good news: You can visit me over at Larch & Loon. I'll still be sharing DIYs from time to time on top other northwest lifestyle content around brewing, biking and hiking.
Here's a new post I know you'll love, a DIY floral bike basket.
See you there,
Maren
Showing posts with label diy. Show all posts
No-Sew DIY High-Waisted Bikini
Last year I wrote a post on how to create your own high-waisted bikini. This post has become one of my favorites and most shared, but a lot of people were curious if there was a no-sew version. So after lots of glue research, I found a way to recreate this look without picking up a needle and thread.
You'll need:
- A one-piece suit (I found mine at Old Navy)
- Fabric glue
- Scissors
Step 1: Cut the one-piece suit an inch or two below the underwire.
Step 2: Fold the suit over and use your glue to adhere the fabric in place. If your suit has ruching on the sides you can use binder clips to hold it in place while it dries.
It’s awesome to see this flattering, vintage style becoming more popular and available in stores. Let me know if you have any questions in the comments and be sure to check out my new blog, Larch & Loon.
No-Sew Heart Clutch DIY
Last week I showed you guys how to make an embellished tee with items from the clearance rack. I used the same approach with this no-sew heart clutch. I found the red purse at Old Navy for $5 and the black cosmetic bag at Forever 21 for $7. So for just over $10 I had a new purse, just in time for Valentine's Day.
The best part about this DIY is that it's no-sew. I didn't bring my sewing machine out to Washington so I've been getting crafty with my glue gun.
Step 1 - Make a heart stencil
Step 2 - Trace your stencil
Step 3 - Cut out your heart
Step 4 - Glue that sucker on
Step 5 - Rock your new clutch
DIY Chain Embellished T-shirt
I'd been on the hunt for a tee with embellished shoulders for months without any luck so I decided to take matters into my own hands! Thanks to some discount jewelry from H&M and Forever 21, this only ended up costing $10 (shirt included). The clearance rack is one of my favorite places to shop for DIY projects. I also picked up a pair of white pleather shorts for another project I'm working on. Stay tuned to see what those will turn into!
All you'll need for this quick craft is a t-shirt, a cheap necklace, needle-nose pliers, scissors, a needle and thread. Simply shorten pieces of the necklace to your desired length, fasten together and sew onto the shoulders of the tee. Simple as that!
DIY Halloween Costumes You'll Want to Wear Again
Are you guys as obsessed with ModCloth as I am? They recently published a post on how you can dress for Halloween if you don't like costumes. Personally, i LOVE costumes, but this inspired me to put together some costume ideas that don't make you feel like you're playing dress up. Bonus: You can totally wear these pieces again!
Meow We're Talking Tights $17.99, You and Meow Forever Heels $64.99 , Claws for Celebration Headband $14.99, Suave Dress $49.99
Spook Your Mind Tee $34.99, Records Before Breakfast Skirt $49.99, Liquid Eyeliner $7.99, Carpal Diem Bracelet $14.99, Generation X-ray Socks $19.99
Extravagant Evening Dress $219.99, Gatsby Green Light Necklace $39.99, Decadence on Air Earrings $19.99
Looking for more ideas? Check out some of my favorites from last year.
DIY No-Sew Felt Peter Pan Collar Necklace
Has anyone else been super into peter pan collars lately? Every time I browse ModCloth (which is EVERY day) I see another item with this vintage touch.
Revamp a simple neckline by adding a peter pan collar! All you'll need is some felt, ribbon and a glue gun. No sewing involved.
Start by tracing the desired shape onto your felt. I did mine freehand but Angus Yornet has an easy pattern you can use. Then, adhere the ribbon with your glue gun. Guess what? That's it! I told you it was easy. Wear alone or add a broach like I did above.
Revamp a simple neckline by adding a peter pan collar! All you'll need is some felt, ribbon and a glue gun. No sewing involved.
Start by tracing the desired shape onto your felt. I did mine freehand but Angus Yornet has an easy pattern you can use. Then, adhere the ribbon with your glue gun. Guess what? That's it! I told you it was easy. Wear alone or add a broach like I did above.
DIY High-Waisted Bikini Bottoms (+ Tankini Revamp)
High-waisted bikinis are making a comeback this year! Before you head to the mall or purchase online, consider revamping an old one-piece you already have.
All you need is an old suit or two, your machine (or you can hand stitch) and half an hour. If you're not good with a needle, check out my new no-sew version!
Simply cut your one-piece horizontally, pin and zig-zag stitch (to account for the stretch). If your suit doesn't have much stretch left you'll want to insert elastic or add darts. Do the same for the top and voilà !
Let me know if you have any questions in the comments and be sure to check out my new blog, Larch & Loon.
All you need is an old suit or two, your machine (or you can hand stitch) and half an hour. If you're not good with a needle, check out my new no-sew version!
Simply cut your one-piece horizontally, pin and zig-zag stitch (to account for the stretch). If your suit doesn't have much stretch left you'll want to insert elastic or add darts. Do the same for the top and voilà !
Let me know if you have any questions in the comments and be sure to check out my new blog, Larch & Loon.
11 DIYs to try in 2014
#1 DIY Button Earrings
Not only are these adorable, they're also super easy and inexpensive to make. Claire from Fellow Fellow will show you how!
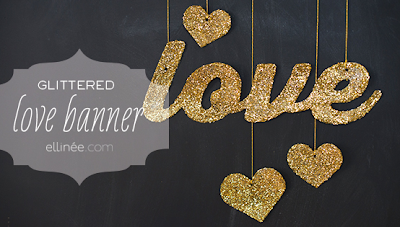
#2 DIY Glitter Banner
I actually started on this project already - way to not procrastinate! I'm doing wanderlust, but you can do whatever word or phrase your heart desires.
#3 Luxe Headband
P.S. I made this... always has the best projects.
#4 DIY Workout Headband
Better make this since another resolution of mine is to hit the gym more!
#5 Handmade Painted Mugs
Plain mugs + acrylic paint + 300 degrees = personalized gifts for all.
Tutorial by MerricksArt.
#6 Map Platter
Another easy DIY from P.S. I made this...
#7 Positivity Jar
Each day write down something that inspired or motivated you and place it in the jar. Get started on this one right away!
#8 Gold and Glitter Dipped Feathers
I still have no idea what I would do with these, but I can figure that out later. Tutorial by Copenhaven.
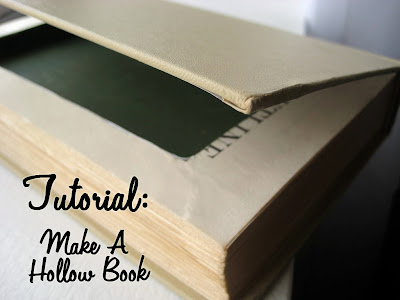
#9 Hollow Book Jewelry Box
The best place to hide something is in plain sight. Keep your jewelry or other valuables safe in a hollow book.
#10 Heart Tights
I'm loving these DIY Valentines tights.
#11 Decoupaged Glassware
You can decoupage on glass? YUP. I have a feeling this will become my new obsession.
Hope this post inspired you to create something (or at least pin something to make later)! What projects are you looking forward to in 2014?
Easy DIY Halloween Costumes
With Halloween right around the corner it's time you choose your fate - I mean your costume. But in all seriousness choosing your costume can be a big deal, especially if you are on a budget. Why not create your costumes out of clothing you already own? Or at least pieces you'll wear again? Here's three easy looks you can create for cheap.
Steal Mary Poppin's style with these pieces from Forever 21.
Get Audrey Hepburn's New York look with a tank dress, collared necklace, and heels from ASOS. Add a pair of shades and a cigarette holder and you're ready for a costume party!
Steal Mary Poppin's style with these pieces from Forever 21.
White Blouse $13.99, Ruffled Umbrella $9.80, Black Hat $14.80, Faux Leather Bow $3.80, Knee-length skirt $6.80
Get Audrey Hepburn's New York look with a tank dress, collared necklace, and heels from ASOS. Add a pair of shades and a cigarette holder and you're ready for a costume party!
Little Black Dress $33.75 (Sold Out Similar $35.60), Chunky Jeweled Collar $22.78, Black Peep Toe Heels $16.88
Another quick costume? Sandy from Grease. You probably have most of these items in your closet but if not Charlotte Russe has them for cheap!
Hopefully this post got your creative juices flowing! What are you going to be this year? Tell me in the comments below and be sure to check out my new blog, Larch & Loon.
DIY: Boxers to Head Wrap
I was out thrifting the other day, looking for Valentine's decor and came across these heart print boxers:
Cute, but I don't wear boxers. Since they were only 99 cents I figured I'd find a DIY project for the fabric someday. Today was that day!
All I did was cut a piece of fabric approximately 24 inches long by 6 inches wide and sew it together. Here's how it turned out:
Perfect for Valentine's Day!
Another fun Vday DIY? Heart garland
Cute, but I don't wear boxers. Since they were only 99 cents I figured I'd find a DIY project for the fabric someday. Today was that day!
All I did was cut a piece of fabric approximately 24 inches long by 6 inches wide and sew it together. Here's how it turned out:
Perfect for Valentine's Day!
Another fun Vday DIY? Heart garland
Glitter + Feather Ornaments
Ornaments are expensive! Target wanted $4 for a glass ornament with a feather in it, seriously? I mean it's cute, but not $4 cute.
I headed to Michael's when they were having their 40% off sale and bought a bunch of glass ornaments, feathers, glitter, ribbon, and some gold floral spray branches. Because I shopped during the sale, I only spent about $12.
All I did was stuff some feathers, glitter, and some branches inside the glass bulbs and then tied a ribbon around the top. Here's the finished product:
What do you think? I hung them on my new Christmas tree I bought at the Dakota Boys Ranch for $13 - what a steal! I also bought this funny little bird ornament while I was there:
Cute, huh?
DIY: Hipster Snow White Halloween Costume
In case you didn't know, I'm a huge social media nerd. That's why I really wanted to be a meme for Halloween this year. I thought about being McKayla Maroney (being not amused), or Madam Secretary (Hilary Clinton), but both seemed kind of hard to carry out. I was about to give up on the idea when my friend Ashleigh suggested we be Hipster Disney Princesses. I was all about it.
It was a given that'd I'd be Snow White since I have short dark hair and fair skin. My costume was really easy to make and very inexpensive since I already owned most of the materials.
To make the top, I took a blue t-shirt that I already had and glued red ribbons to the sleeves. I purchased the skirt at Gap for less than $5 on clearance and the bow at Walmart for $1.
To add the "hipster" element, I wore glasses that I had already owned from zenni optical. They have perscription glasses for as low as $6.95! The vest and boots were items form my closet. You could incorporate other elements like a plaid shirt or denim vest instead.
Our signs were obviously handmade, too. I spent a total of $6 on my costume. My friend Ash went as Hipster Arial, and put her costume together for pretty cheap, too.
It was a given that'd I'd be Snow White since I have short dark hair and fair skin. My costume was really easy to make and very inexpensive since I already owned most of the materials.
To make the top, I took a blue t-shirt that I already had and glued red ribbons to the sleeves. I purchased the skirt at Gap for less than $5 on clearance and the bow at Walmart for $1.
To add the "hipster" element, I wore glasses that I had already owned from zenni optical. They have perscription glasses for as low as $6.95! The vest and boots were items form my closet. You could incorporate other elements like a plaid shirt or denim vest instead.
Our signs were obviously handmade, too. I spent a total of $6 on my costume. My friend Ash went as Hipster Arial, and put her costume together for pretty cheap, too.
Most people thought our costume were hilarious, but some people were really confused! The best part was running into other memes like Scumbag Steve and Bad Luck Brian!
Spruce up a Bookshelf: DIY
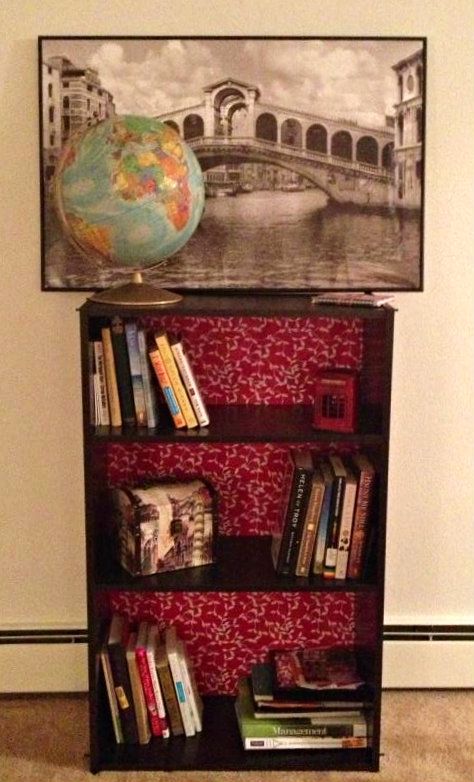
You know those super cheap bookshelves you can get at Target? The ones that don't even have a real back panel, just cardboard? Well it's super easy to spruce them up a bit with wrapping paper!
I bought some on clearance at Target for $1.38 and covered the cardboard with it and here is how it looks now:
It took less than 5 minutes to do this and it gives the bookcase a whole new look without having to commit like you'd have to with paint! Cute, huh?
DIY Sheet Music Earings
I made these super easy sheet music earrings for my friend Laura for her birthday. She is very musically talented, and I had this old piano lesson book so I thought, why not! You could also make these with maps, newspaper, or really any type of paper or fabric. Thanks to modge podge, anything is possible!
1. All you need is some earrings, modge podge, and you paper/fabric of choice.
2. Trace the earring on the paper.
3. Cover the earring with modge podge.
4. Put the paper on and hold in place for a few seconds.
DONE! I told you they were super easy!
Bonus: I bought the earrings at a thrift store (don't worry Laura, I sanitized them) so they only costs me 50 cents!
Let me know if you have any questions in the comments and be sure to check out my new blog, Larch & Loon.
DIY: Gift for Dad
My Dad's Birthday was coming up and I was sick of getting him lame gifts. I wanted to get him something special, but what? While searching for "gifts for dad" online, I came across a really neat blog post by Holly from nothingbutbonfires. Like Barry, Holly's father talked about the past a lot. So she thought, what if I gave him 60 memories for his 60th Birthday? After reading her post, I knew I had to do the same thing for Pops.
With only 3 weeks to Barry's Birthday, I decided I'd do a smaller scale version of Holly's. I sent out an email to my dad's family and friends.
Most of the memories made my dad laugh, but a few were a little more sentimental. Here is his brother Rick, who is no longer with us. It's a little hard to see, but he is holding up a sign that says "Happy Birthday."
On a lighter note, check out those ruffles!
I wish I would have taken more pictures, but I was too busy listening to all the stories. My dad said this was the best gift I've ever gotten him, and it only cost me $10. It truly shows that it is the thought that counts. Thank you again to everyone that helped out with this project! I couldn't have been happier with the how it turned out!
With only 3 weeks to Barry's Birthday, I decided I'd do a smaller scale version of Holly's. I sent out an email to my dad's family and friends.
Friends and Family,
I'm writing to you because Barry is turning 63 years old this month and I'd like your help with his birthday gift! What I'd like to do is collect as many memories as I can about Barry from all of his friends and family. I think this would be the perfect gift for my dad because he's always telling me stories about when he was younger...stories about going to the drive-in theater with his family (he still recalls the titles of all of the movies he ever saw there), stories about The Village Idiots, his band that never made it big, stories about "Husky Barry."
If you have a spare moment in the next few days, I’d be so grateful. All you have to do is write down the memory on a piece of paper and mail it to me. You can mention anything you like -- although the more nostalgic the better! Please contribute as many memories as you'd like, the more the merrier, just make sure you write them on different pieces of paper (and sign your name to each) so I can split them up. His Birthday is August 26th, so please send as soon as possible. :)
Due to the short time frame, I expected to receive 15, maybe 20 memories. Two weeks went by and nothing. I was disappointed because I thought this would be such a hit!
Well my family pretty much lives by the saying, "better late than never," so I should have known that the week before the celebration I'd finally receive some memories! And it wasn't just memories. There were tons of old photographs and even some old letters!
I started compiling everything into the envelopes. It took almost 3 hours just to organize and label everything and I ended up with exactly 63 memories. Crazy, right?
We watched my dad open them all. Every single one sparked a more detailed story, which made this a 2 day process (if you know Barry, you know how much he loves to tell a good story). Here are some of the highlights:
Check out this picture of my dad's band, the Syndicate.
Most of the memories made my dad laugh, but a few were a little more sentimental. Here is his brother Rick, who is no longer with us. It's a little hard to see, but he is holding up a sign that says "Happy Birthday."
On a lighter note, check out those ruffles!
I wish I would have taken more pictures, but I was too busy listening to all the stories. My dad said this was the best gift I've ever gotten him, and it only cost me $10. It truly shows that it is the thought that counts. Thank you again to everyone that helped out with this project! I couldn't have been happier with the how it turned out!
DIY: How to turn a poster into art
After landing a big girl job and turning 23 I felt like it was time to get some sophisticated art to replace the tattered posters on my walls. But art is expensive (even at Hobby Lobby and TJ Maxx)! So instead of splurging on something new, I decided to just dress up what I already had.

It'd be best to use a fresh canvas, but this was just going to get thrown out so I thought I'd put it to good use.
I used the glue to make homemade modge podge. Babblings and more has the recipe (its just water and glue).

Then, I placed it over top of the canvas, folded the edges over and covered it in more modge podge.
Just let the image dry and voila! So easy!
The other poster I had was in much better condition so I was able to just frame it. Doesn't it look much classier than just stuck on the wall, though?

You can buy poster frames at Target for about $20, but I suggest going to a local thrift store to find one. I bought mine from Savers for $6.
I started with this Il Bacio poster that had tattered edges from going up and down from dorm rooms to apartments over the years, an old canvas and glue.It'd be best to use a fresh canvas, but this was just going to get thrown out so I thought I'd put it to good use.
I used the glue to make homemade modge podge. Babblings and more has the recipe (its just water and glue).
To make the poster easier to work with I soaked it in the bathtub for about 3 minutes while I covered the canvas with my homemade modge podge.Then, I placed it over top of the canvas, folded the edges over and covered it in more modge podge.
Be careful when covering the print because you can smear the ink if you aren't careful.Just let the image dry and voila! So easy!
The other poster I had was in much better condition so I was able to just frame it. Doesn't it look much classier than just stuck on the wall, though?
You can buy poster frames at Target for about $20, but I suggest going to a local thrift store to find one. I bought mine from Savers for $6.
I ended up spending a total of $8 turning these old posters into works of art! Not bad!
Let me know what you guys think or if you have any questions!
DIY: Paper heart wall decor + owls
These paper hearts are really simple to make. All you need is an old book, some fishing line, a gluestick, and a scissor. You can usually find old books for cheap or free at your local library.
Just cut out 2 hearts (using a stencil so they are an exact match) and glue them together with the fishing line inside. It goes a little slow at first, but once you get the hang of it it's pretty quick. I made 25 hearts and it took about 45 minutes, but I had a helper (thanks Nate!).
I hung mine over my bed:
I think I'll eventually have them go all the way across the wall. What do you think?
Unrelated: check out this super cute owl jewelry holder I bought at TJ Maxx for $9.99!
Until next time,
Maren
Subscribe to:
Posts (Atom)


.png)